How To Add Text in KineMaster Pro Video Editor
 |
KineMaster offers you a set of 38 free fonts which you can use in your videos. You can create subtitles, add few directions to your videos etc. But do you know how to use the text tool in KineMaster? If not. Then this guide is definitely for you.
What is Text Tool in KineMaster?
“Text Tool” in KineMaster allows you to add texts to your clips or videos. You can add texts to your clips by using the KineMaster Text Tool with ease. You get the option to choose any font you like from the already available presets. You get a total of 38 fonts in KineMaster. Out of which 23 are “Android Fonts”, where as the rest are “Latin Fonts”. Let us get to know more about all the fonts in KineMaster in the list provided below;
(1.) Android Fonts in KineMaster
 |
| KineMaster Text Tool : Android Fonts |
- Dancing Script Regular
- Dancing Script Bold
- Droid Sans Mono
- Noto Serif Regular
- Noto Serif Bold
- Noto Serif Italic
- Noto Serif Bold Italic
- Roboto Thin
- Roboto Light
- Roboto Regular
- Roboto Medium
- Roboto Bold
- Roboto Black
- Roboto Thin Italic
- Roboto Light Italic
- Roboto Regular Italic
- Roboto Medium Italic
- Roboto Bold Italic
- Roboto Black Italic
- Roboto Condensed Regular
- Roboto Condensed Bold
- Roboto Condensed Italic
- Roboto Condensed Bold Italic
(2.) Latin Fonts in KineMaster
 |
| KineMaster Text Tool : Latin Fonts |
- Bevan
- Creepster
- Great Vibes
- Junction
- Knewave
- Latin Bold
- League Gothic
- League Script
- Linden Hill
- Orbitron Medium
- Orbitron Bold
- Raleway Thin
- Redressed
- Sniglet
- Sorts Mill Goudy Italic
Those were one of the examples of the available fonts in KineMaster. Well the list above contains information about only the “Free” fonts and not the paid one. If you have purchased a KineMaster Subscription. Be it monthly or annual subscriptions, you will have access to even more better fonts in almost infinite number.
The price cost for subscribing to KineMaster Pro Video Editor is ₹287.37 monthly. And if you opt for the annual subscription you will get it at a 33% discounted price of ₹2299.81 respectively. Do note that the prices mentioned above may change or vary for each country. Depending on where you live.
So now that we know about the text tool in KineMaster. We've also learnt about it's different fonts along with all the available free fonts. Let's now learn about the customisation we can make to our texts in KineMaster. Let's learn about the adjustment or customisation options of the text tool in KineMaster.
What are the adjustment options of Text Tool in KineMaster?
 |
| KineMaster Text Tool Adjustments |
KineMaster offers you the ability to choose between different fonts, styles, animations etc. Thus giving you the freedom to design your texts the way you want. Let us get to know more about each option provided by KineMaster in the following paragraphs provided below.
(1.) Text Adjustments
You can choose any font of your desired choice. You can then add colour, shadow, you can also adjust the opacity etc. of your texts in KineMaster. You also have the option to align your text Left, Right or Center. And you also have the option to drag your text left or right or increase the size or decrease the size of the text by stretching the text.
(2.) Animations
Animations are a great way to tell a story. You can add text animations such as Fade In, Fade Out, Slide Up, Slide Down etc. Once you have added the choice of your animation styles. You can then even adjust the speed of the animation by adjusting the time or speed of each clip in KineMaster.
Since we now know about each adjustment options of the KineMaster Text Tool. Hence we shall now move ahead with our tutorial. Let us now learn how to actually use it.
How to add texts in your videos using KineMaster?
In order to add texts in your videos using KineMaster Pro Video Editor. Follow the instructions provided below.
Step 1 : Open KineMaster Pro Video Editor along with your clips.
 |
You will basically need few clips in order to get started. If you don't have any footage of your own, or if you haven't filmed any. Worry not. You may still use your images as short clips.
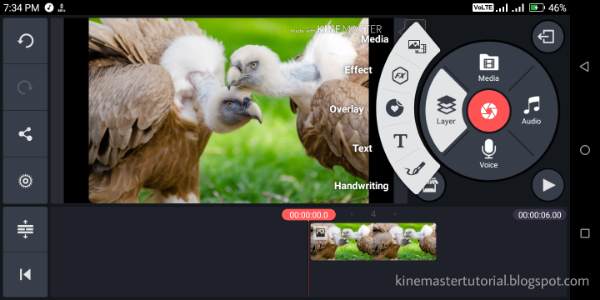
Step 2 : Tap on Layer>Text.

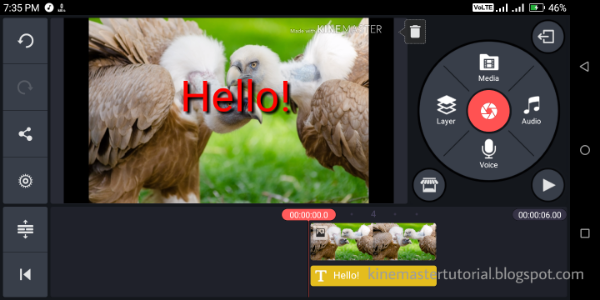
You will now be asked to enter your text. Just type in the word you want and tap on the top right check mark (√) to enter your text. If you're not sure what to write. Just start with “Hello”.
Step 3 : Make all the necessary adjustments to your texts.

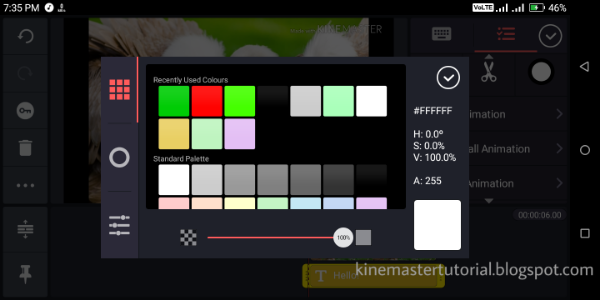
As mentioned earlier in this tutorial. You can basically customize your texts the way you prefer. Pick your favourite colour, animation, and place your text in an appropriate location. A place where your texts will be clearly visible. And when you are done adjusting your texts. Tap on the top right check mark (√) to save your progress.

Okay so the steps mentioned above is what you'll exactly have to follow in order to add a text in your clips using KineMaster Pro Video Editor.
FAQ (Frequently Asked Questions)
Q. Can I use multiple texts within the same clip?
Ans. Yes you can use multiple texts within a same clip.
Q. Can I add texts in image clips?
Ans. Yes you can add texts in image clips.
Q. Can I add animations in multiple texts?
Ans. Yes you can use multiple animations in multiple clips.
Q. Can I get paid fonts for free?
Ans. No you can't get paid fonts for free.
Q. it worth upgrading to get better fonts?
Ans. Yes, it's worth upgrading to get better fonts. However, the fonts included with the free version is more than enough for most users.
Q. Can I change the opacity of the texts?
Ans. Yes you can change or adjust the opacity of the texts.
Q. Are the subscription rates mentioned above accurate?
Ans. Yes by the time of publishing this post. However prices may change or vary due to various reasons.